Two Wheels - Six Strings

Random news and thoughts about various two-wheeled projects and music, especially my band, Skull Full Of Blues.

Sunday, January 29, 2006

Carb Problem Solved


Brad, Randy and I went for a nice little ride, today. We hit a couple of coffee shops, and the Denver Art Museum. Brad and I were on the Thruxtons, while Randy rode his naked SV650.
Temperature was in the mid-forties, and the sun was shining. The wind was blowing pretty hard, but it was a pleasant day for a ride.

It was a horrible day for working on a motorcycle, though, as I found out after getting home. The wind, which had pushed us around a bit on the bikes, cut with a keen edge as I sat beside the Yamaha removing the float bowl.

I pulled the float, held it near my ear and shook it. Slosh, slosh! Full of fuel.

After installing the new float, and buttoning everything up, I started the motor. No major leaks, no drama. I'll wait until the weather is a little nicer to replace the float bowl gaskets and reclean the jets (I saw some debris in the bottom of the float bowl when I had it off). I'll install inline fuel filters at that time, as well.

I still need to rebuild the brake caliper, as well as bolting the inner rear fender into place. Then, it's time to have the new tires and tubes installed, finish mounting the seat/tailpiece and paint the bodywork. Things are progressing.

The New Parts Are Here! The New Parts Are Here!


Well, it's not really that exciting, but I am glad to see them. Hopefully, I will be able to find time to install the new float and see if that fixes my carb problem. If so, I will installl the two new float bowl gaskets, as well. If not, I'll buy new carbs. I'm hoping the float will do it, budget-wise.

Then, it will be time to disassemble the brake caliper and see what's happening there. I really hope a good cleaning and polishing of the piston will do the trick. I'll know more after I get it apart.

$44.00 worth of parts. Total cost so far, about $1150.00.

Wednesday, January 25, 2006

I Hate Waiting For Parts


I am waiting for the new carb float and the brake caliper rebuild kit to arrive from Mike's XS, and I hate the anticipation. Not that I've had the time or the weather to work on the bike much, lately.

I did manage to get some time, this afternoon, to start work on the inner rear fender, though.
While I was rooting around in the storage shed, looking for some sheet aluminum to use, I found an old superbike plastic front fender. I think it was from a GSXR-750, but I'm not sure.

Anyway, it looked like it would foot the bill. So, I cut the rear portion of the fender off, just behind the mounting points.

This first picture is of the portion I didn't use.

Then, I test fitted the rear portion inside the frame of the Yamaha. I propped it up, temporarily so that I could see if it was going to work.

It seemed to work, so I set the seat/tailpiece back into place, and fine tuned the positioning, a little. I don't want to see the inner fender, but I want it to pretty much isolate the under-seat area from tire spray and such.

I think it will actually work out pretty well, once I can take the rear wheel out and use some self-tapping screws to attach it to the stock steel lower fender. I'll then make some simple mounting braces for the rear portion.

While I was at it, I installed a new fuel line from the tank to the left carb, just to double check that the problem wasn't as simple as a line leak. It still appears to be a float issue. As long as I am revving it up, there's no apparent leak. But, if I let it idle on choke, fuel dumps out of the port at the bottom of the float bowl. So, I will replace the float and see what happens.

Since I haven't ridden a motorbike in almost a week, I decided I should start the Triumphs and burn the condensation out of the pipes.

The Thruxton has TORs on it, and the Trident sports a full Yoshimura 3 into 1 system, so it sounded pretty good with the two of them idling side by side. At least, I thought so, anyway. Not too sure about the neighbors...

Monday, January 23, 2006

Spending Money Again


I didn't get any work done on the bike, today, but I did order a new float for the left carb. I also bid on a front brake caliper, on eBay, but didn't get it.

So, I guess Mike's XS will get another order from me, tomorrow, for a caliper rebuild kit. $28.00.

In the meantime, I got the custom tank decals I ordered fom Germany. Lutz Helmsmuller at http://www.LunaArt.de set me up with a couple of "Trimaha" - style tank decals for $15.00.

Brings my total, so far, to just about $1100.

I had a hard time getting a picture of this, as it is a white decal on white backing paper. I finally taped it to the screen of my monitor, and used the CRT as a light box. The color is wrong, but you can see the design.

I might get the sheet aluminum and start fabbing the inner rear fender, tomorrow. I can do most of that inside, which is good due to the fact that the sun is nearly set by the time I get home from work. But, at least the days are getting longer, now. Come on Springtime!

Sunday, January 22, 2006

Turn Signals


It's 38 degrees F out on the old Patio Of Doom, but the sun is shining. In Denver, as long as you can stay in the sun, the conditions are livable with temps in the high 30's.

I made a couple of seriously simple mounting brackets for the turn signals, today. They consist of two short lengths of aluminum stock, each with two holes drilled through it. The stalk of the turn signal fits through one hole, and the other fits over the rear shock mount. Crude, but effective.


Mounting them up was pretty straightforward, but I'm going to go back and double check that all the connections are secure, later. A couple of the wires popped loose as I was reinstalling the seat, making me wonder why the tail light no longer worked. I reattached them, but I want to make sure they don't come loose while riding down the road.

While I was installing the turn signals, I went ahead and bolted the muffler brackets on. Now, I can start the engine without worrying about the cans walking their way off of the headers.

Next up was the front signals. I popped the stock Yamaha units out, and plugged the new ones in in about five minutes. Then, I did it again, since I had lost the ground when I reassembled the headlight.

The signals looked great, but wouldn't flash. I figured the battery was just cold, and not putting out enough juice. So, I decided to start the engine and see if the flashers would actually flash, rather than just lighting up.

Turned on the gas, hit the choke and watched as gas started to dump out of the left carb in a large, steady, stream! I turned off the petcock, and gas continued to run out of the left carb (the right carb was behaving itself). Hmmmm. I'll have to look into that, later.

Like an idiot, I did go ahead and start the motor, briefly, just waiting for the thing to go up in flames. I ran it just long enough to check the flashers (they worked fine, as I thought they would), and then shut it down.

The bike, so far...

There are two fairly serious mechanical things left to look at:

1. The carb leak

2. The pistons are sticking in the brake caliper, and need to be removed and cleaned up.

Other than that, and installing the new tires and chain, changing fluids and other maintenance-type chores, about all that is left is cosmetic work.

Well, I guess I need to fabricate an inner rear fender, as well, come to think of it. That should be pretty simple, though.

Saturday, January 21, 2006

It's The Little Things...


So far everything has gone pretty smoothly, as far as the Yamaha is concerned. Everything except mounting the license plate, of all things!

I got the plate, yesterday, and took it out to the bike, along with two bolts to attach it to the fancy little mounting plate on the tailpiece. Unfortunately, the plate is drilled too close to the base of the tail light, and the holes wouldn't line up.

So, out comes the electric drill...

I put four holes (4-1/2 if you count the one I had to enlarge because I drilled it slightly off-center) in the mounting plate, and bolted the license plate to it.

It only took about 10 minutes from start to finish. Considering the fact that it should have taken 30 seconds, though, that seemed like a long time.

Still a little chilly on the back porch...

Hopefully, it will warm up a little in the next couple of days and some progress can be made.

Friday, January 20, 2006

Too Cold to Work

We got too much snow and cold air, the last few days, to really get any work done on a covered (but open) patio. However, it wasn't too cold to buy some small parts.


I got two pairs of these alloy Lockhart Phillips turnsignals. The lenses measure about 1-1/2 by 2-1/2 inches, with a one inch long stem. I like the smaller signals; they really clean up the lines of the bike. I would rather have no signals, at all, on a bike like this, but I just can't bring myself to ride in Denver traffic without them.


I used similar turn signals on my flat black 1983 Interceptor Street Fighter project, a few years ago, and they worked fine.


From the side, they are virtually invisible.


But from the rear, or front, they show up fine.


So, I got those, and some exhaust repair tape (to use as a gasket between the mufflers and headers), wire connectors for the tail light, and bolts to attach the muffler brackets to the frame.

That brings the total out of pocket expenses, so far, to about $1050. I have a budget of $1500 for this project, and it looks like I might get in under that. Kinda depends on what I decide to do about paint.

I think the tank which is currently on the bike, and the side covers, will probably just get rattlecanned for the time being. That gives me the option of waiting until I come across a bargain of a paint job for the primered tank. Who knows, the rattlecan job might end up being permanent, depending on how well it comes out.

Thursday, January 19, 2006

XS 650 STREETRACKER PROJECT

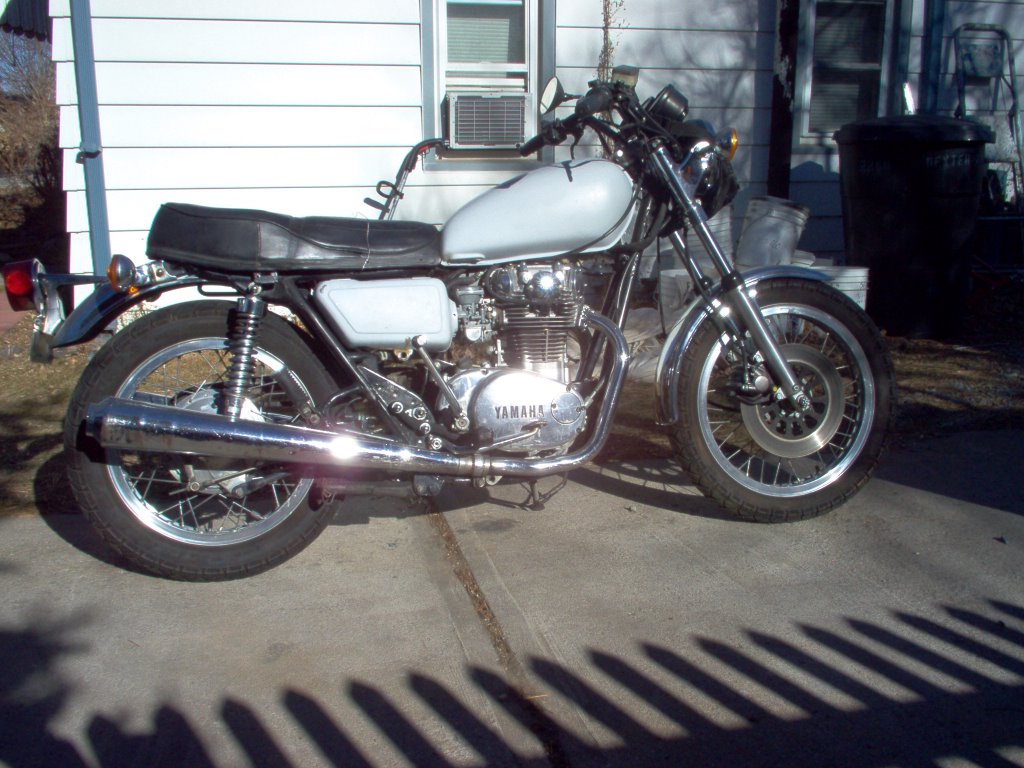
I picked this 1977 XS 650 up on January 9, 2006. I bought it from Kevin, the service manager at the local Triumph dealer, after my best friend Brad “brokered” the deal. Cost: $400.00.


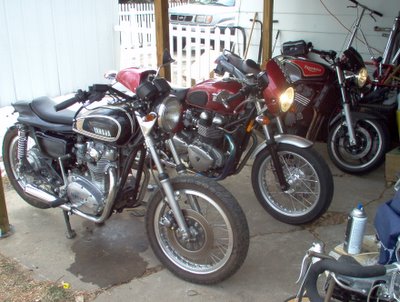
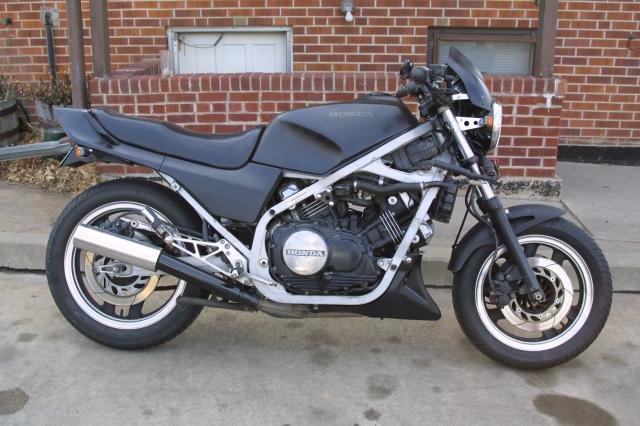
As you can see, it was fairly stock. The original seat was in sad shape, and the body work was all in primer, but all of the pieces were there.

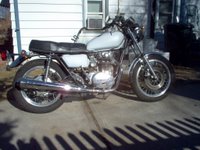
Unfortunately, the master cylinder for the disc brake had gone bad, and the choke lever was missing from the carb.

Along with the bike, and various rubber mounting parts, I also got a new set of Bridgestone tires and new tubes. The bike also had a set of wide flat-track racing bars.


This was fine with me, as I had decided to build this bike up as a “streetracker” style bike. So, I ordered a $245.00 seat/tailpiece, and set about working on the bike.


I went down to the battery store and spent $32.00 on a new battery. Once it was hooked up, I sprayed some starter fluid in the carbs and kicked her over. On the third kick, the motor started. I was quite happy with that.

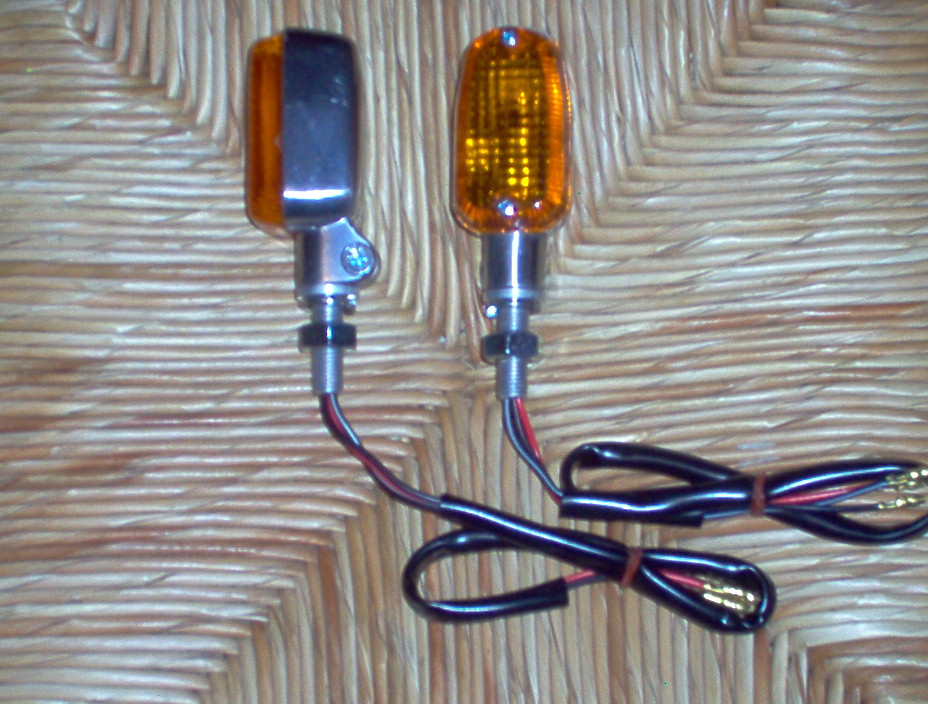
The motor started, the lights worked and even the flashers were operational. The next thing to address was the front brake.

Since the plastic reservoir on the master cylinder was in such poor shape and the lever was broken, I decided to replace the whole unit. While I was at Steele’s Motorcycle Salvage, picking up a working master cylinder, I found a rough but usable tank from a 1975 XSB. I figured I would use that tank to get the bike up and running, rather than putting gas into the primered tank which came with the bike.

Brake parts and tank cost me $96.00.

Once I was home, I removed the old brake cylinder, and installed the new one. I filled it up with fluid, and started trying to bleed the air from the system. Three hours later, I gave up. The temperature was in the mid 30’s, and the wind was cutting through me like a knife as I worked on my covered patio.

I got on the internet and did some reading. Seems that if you get enough air into a brake system, you simply can’t get it to bleed in the normal manner. What is required is a vacuum pump-style brake bleeder to pull the air out.

So, down to Performance Motorcycle parts the next day (Friday the 13th). The vacuum bleeder ($41.00) and a set of K&N filters ($83.00) set me back $126.00.

Thirty minutes after I got home with the bleeder system, the brakes were working. Money well spent.

Before I went to Performance, the mailman had delivered my seat/fender. After getting the brakes set up, I went to the auto parts dealer down the street and picked up some parts (fuel line and ground wire for the tail light). Tyler Max, who will hopefully use this bike to learn to ride, had come over after school and went with me to the auto parts dealer.

When we got back to the house, we hooked up fuel line to the (leaky) petcocks, and trimmed the frame down in order to “dry-fit” the seat and tank.


Then, we set the seat in place, with gas in the tank…
With a liberal application of starter fluid and enough kicking to make me sweat (temps in the 60’s), we got the motor started. It idled fine, once the carb float bowls filled with gas, but wouldn’t rev up with the throttle.

So the next step is to trouble shoot the carbs. Hopefully, the throttle jets are simply clogged from fuel varnishing (the bike sat for 3 years without running). But, the diaphragms in the carbs may have deteriorated.

At this point, the total cost added up to $899.00.


01/14/2006

A red letter day in the project.

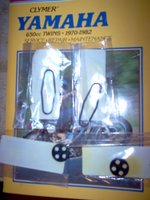
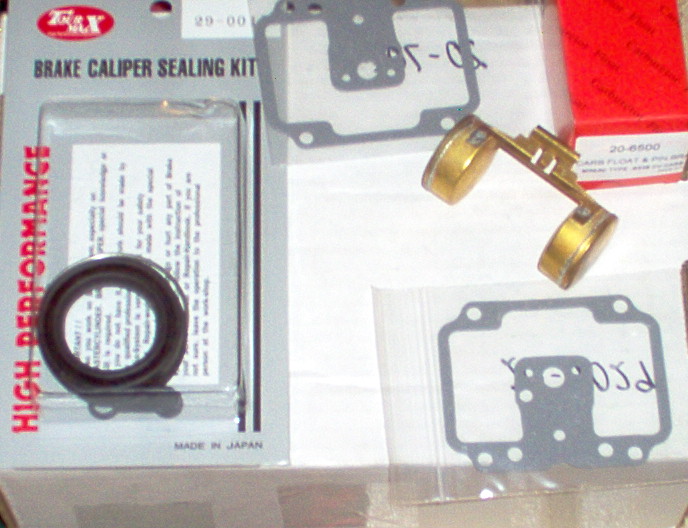
This morning I went to Vickery Motorsports and bought the rubber gaskets for the fuel petcocks. Four inner gaskets and four o-rings set me back $60.00! Ouch! But, I want to have both tanks usable, so I have to overhaul 4 petcocks.


Thirty dollars worth of rubber parts resting on my Clymer manual.


After I got the petcocks fixed, I took the jets out of the carbs and blew the junk out of them. Then, after reassembling the carbs and hooking up the tank, I started the motorcycle and actually rode it up and down my street.

I was a little nervous. After all, I was riding a bike which had not moved under its own power for about 3 years (no telling what might happen), and the seat pan was just sitting on the frame, held in place by my weight. But, I made it up and down my block without incident, and parked it back on the patio.

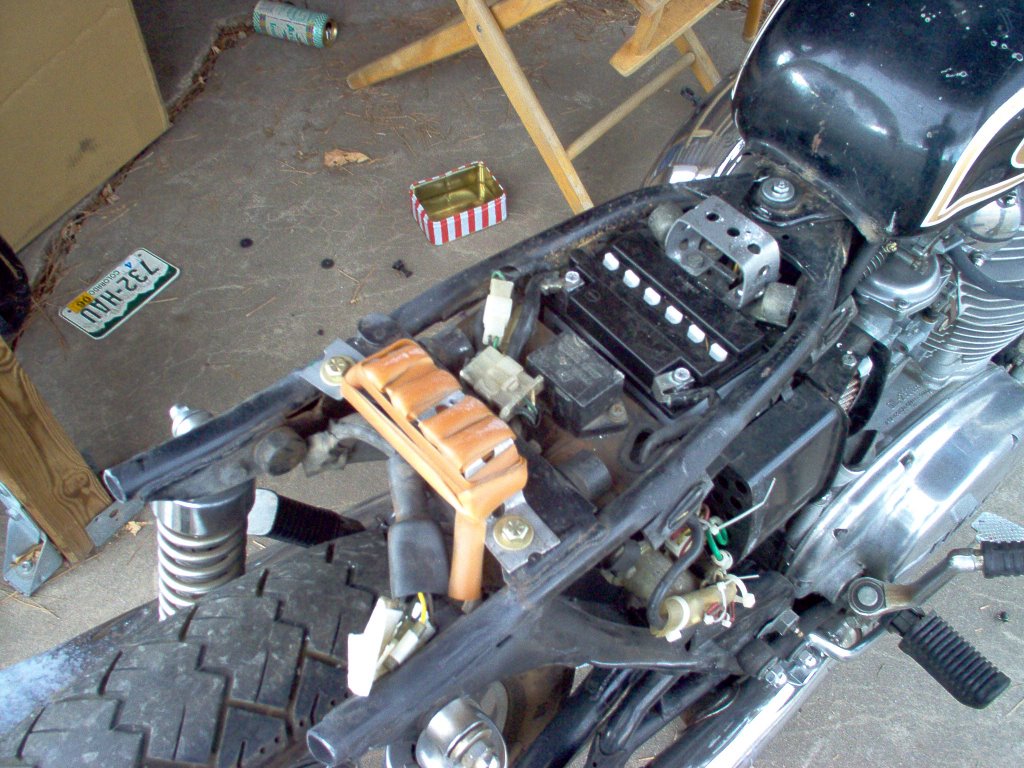
At that point, I got out the trusty angle grinder and removed the stock seat hinges and lock assembly, ground the welds down and sprayed a little black primer on the raw metal. Don’t want the frame to rust.

As the sunlight was fading, I sprayed some gloss black on one of the side covers, and hung it on the bike. I just wanted to see how it would look.


It looked pretty good to me.


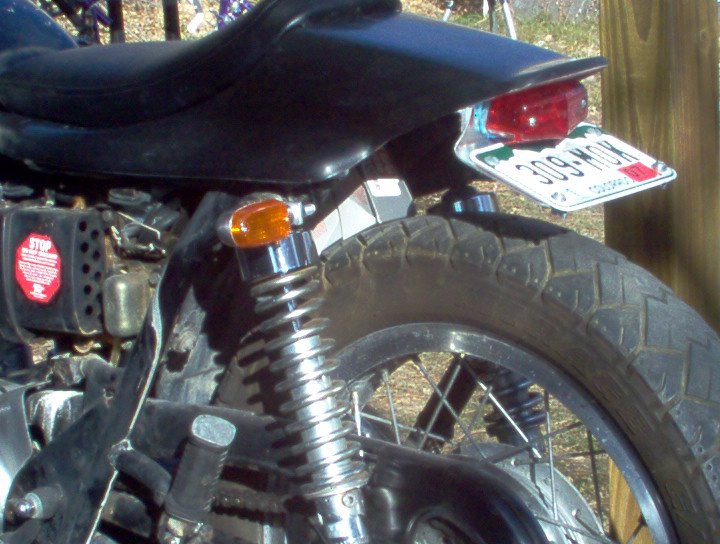
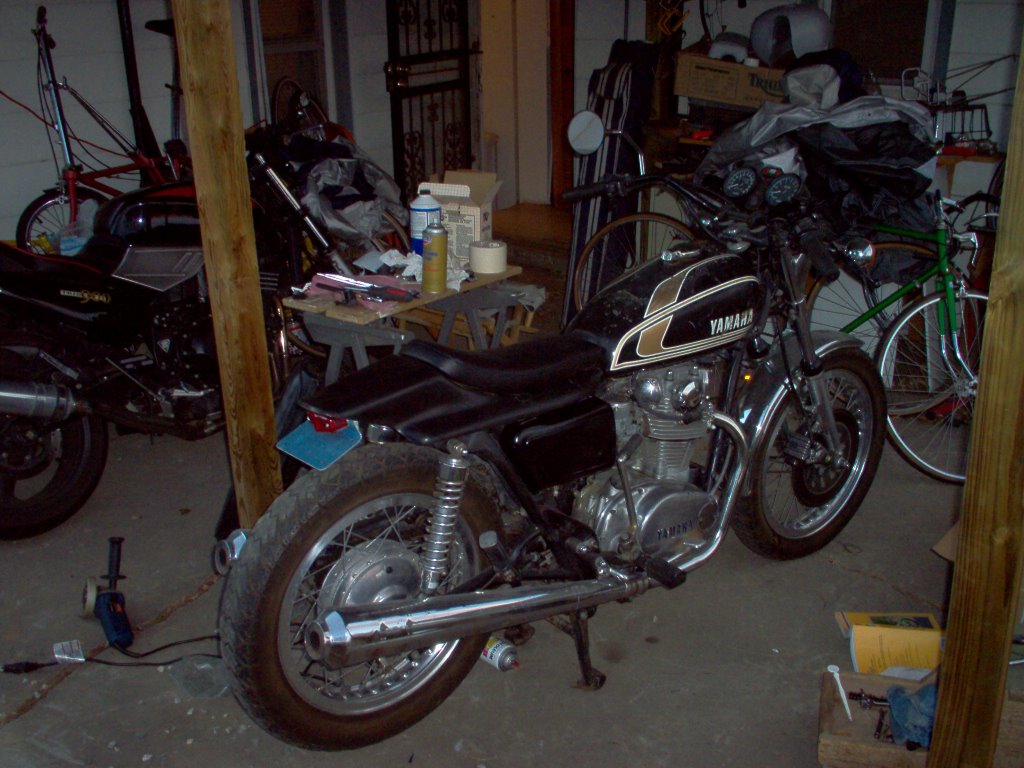
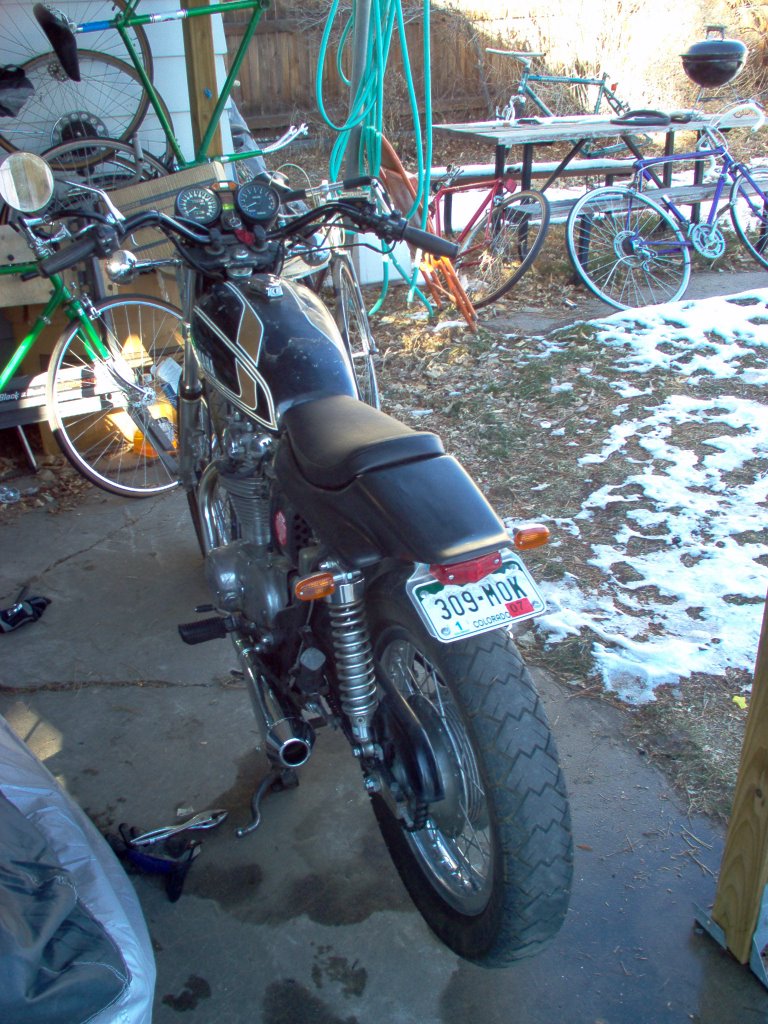
Here it is from the rear:

World’s messiest patio?

The next step, I believe, should be to fabricate the mounts for the seat pan. I purchased iron stock for this, today ($10.00)

Cost so far: $970.00.

01/15/2006

The weather forecast called for a winter storm to move into Denver, so I decided to try and get the seat mounted and put the bike under a cover until better weather moved back in.

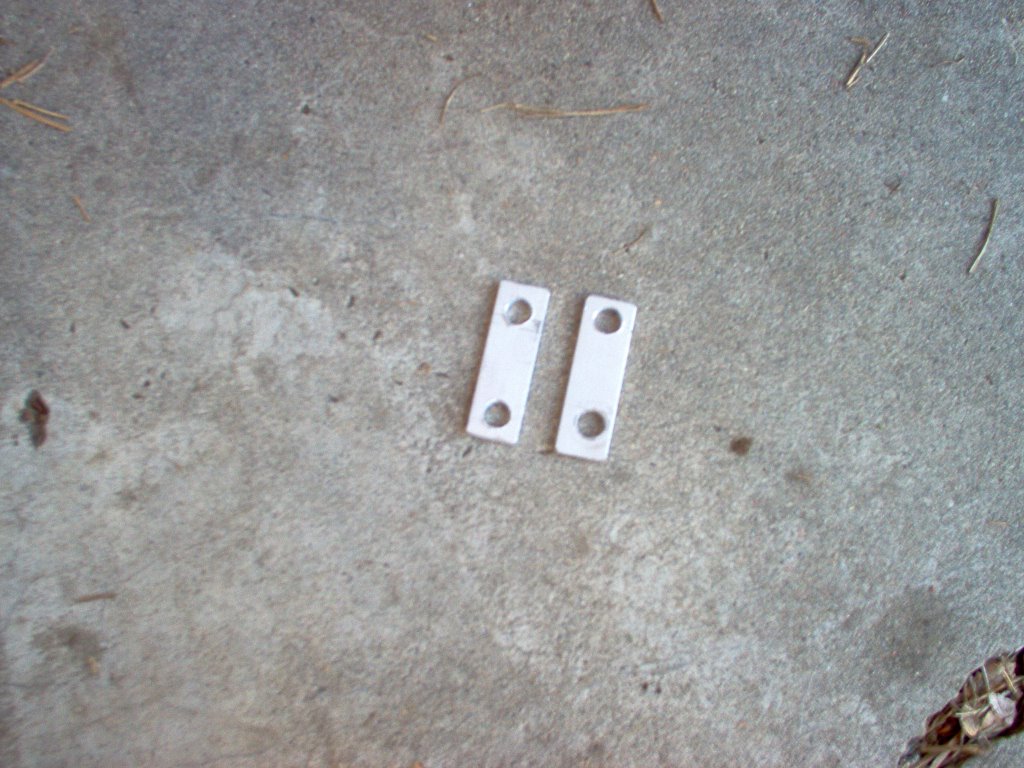
I used some steel strapping, sourced from Ace Hardware, to bend up a rear mount and a front mount closely approximating those suggested by Hotwing (the seat manufacturer).


I wrapped the rear mount in rubber for vibration damping.

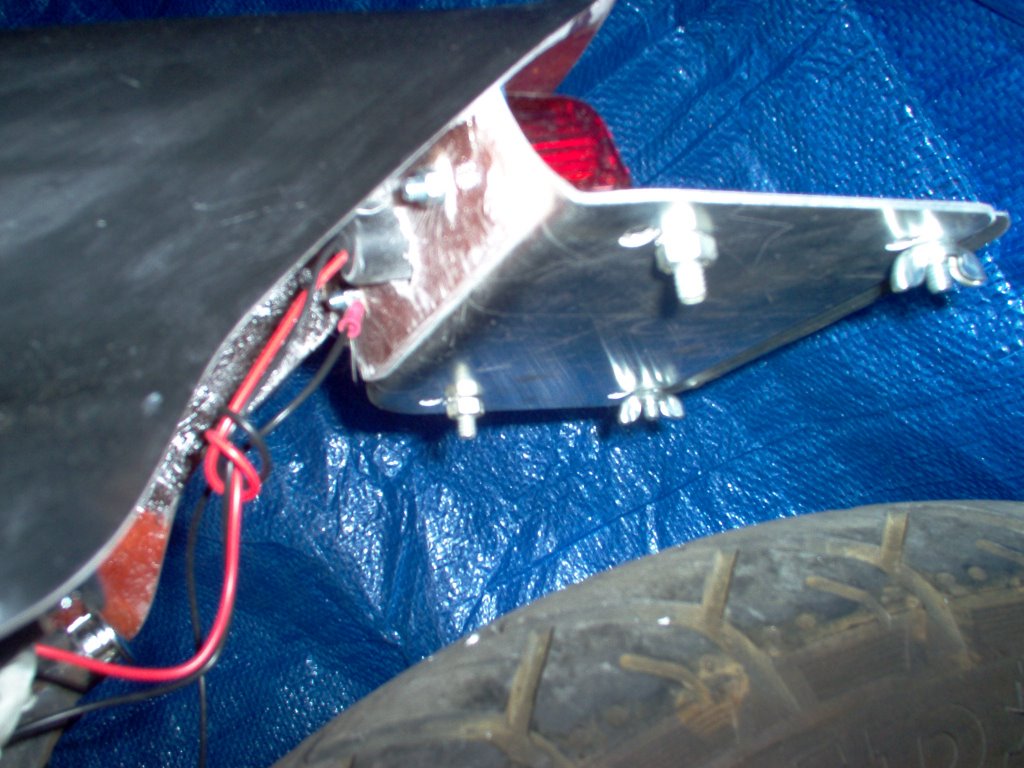
I drilled two holes into the plate which spans the frame just in front of the shock mounts, and bolted the rear bracket in place. The front utilized two existing bolts. Per Hotwing’s instructions, I drilled holes for self-tapping sheetmetal screws to attach the seat pan. (I only drilled one each, front and back, and will put two more in the rear and one additional screw in the front, later.)

I have to say, I don't care much for the self-tapping screws holding the seat on. It is very fiddly to get the holes aligned. I think I'll try to figure out some other method t attach the pan to the braces.

The seat pad will be attached with industrial-strength Velcro, after the seat pan has been painted.

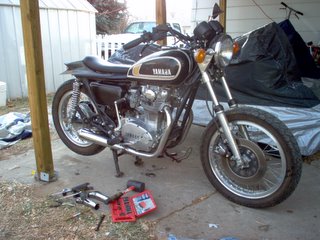
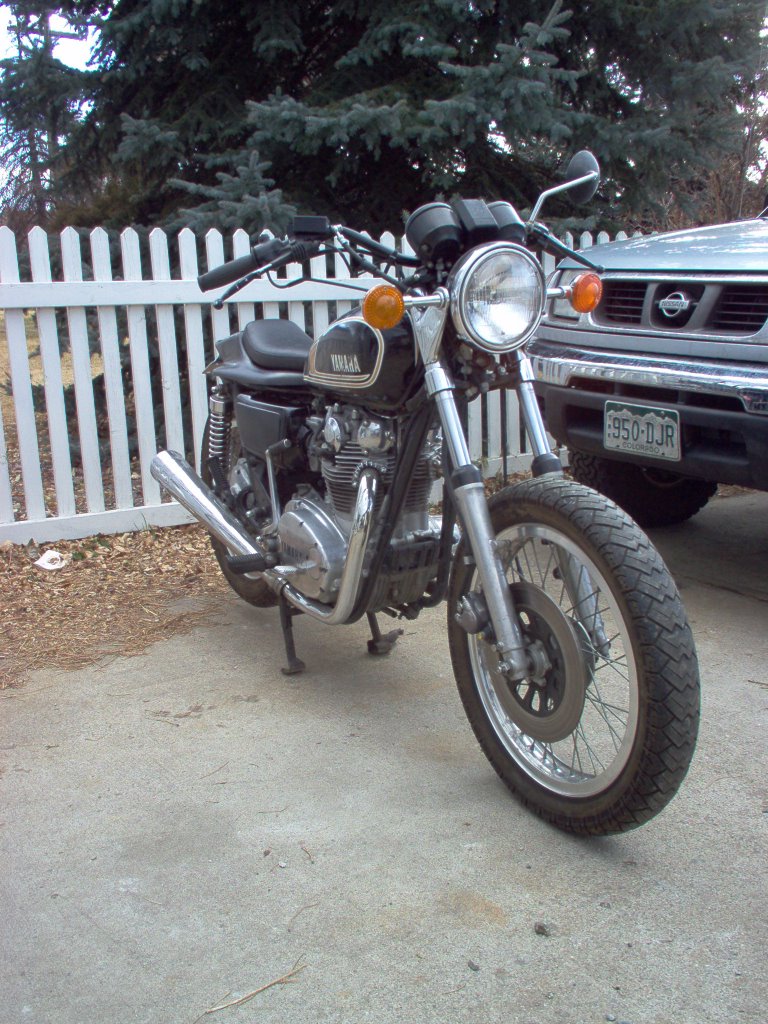
I also pulled the front fender off of the bike, just to check out how it looked. It will probably stay off.


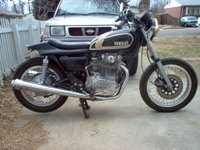
It is beginning to look like a flat tracker.

01/16/2006

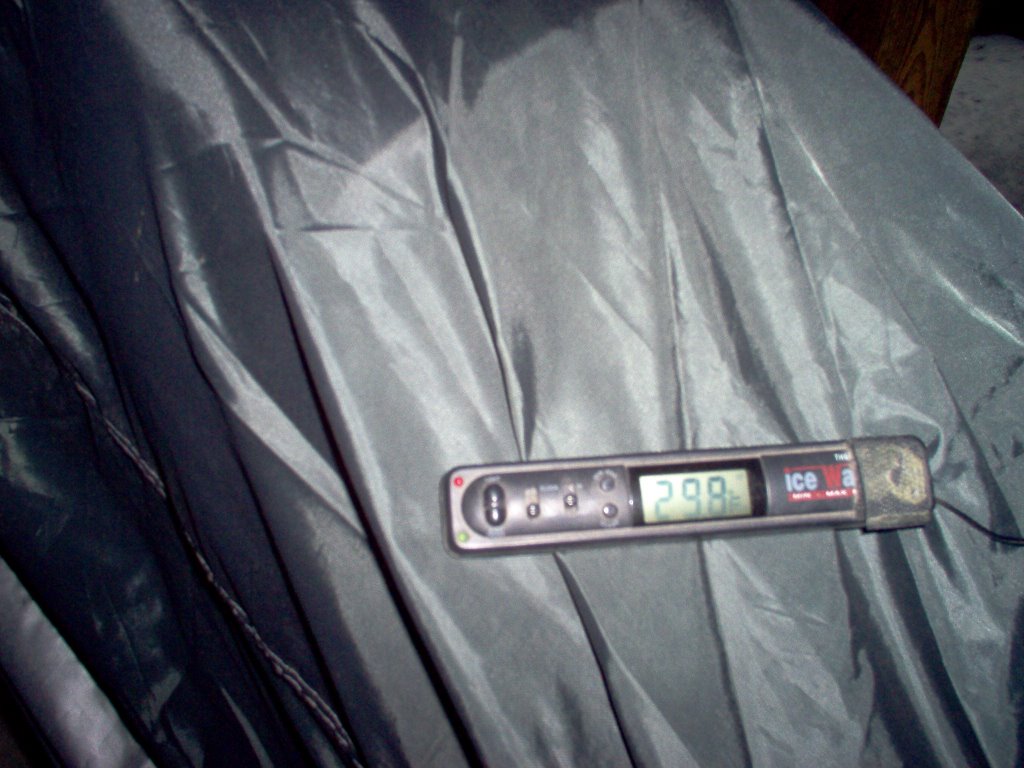
Cold weather moved into Denver, overnight, and we woke to a dusting of snow. However, the temperature warmed, a bit, in the afternoon and I decided to look at the wiring for the tail light.

After about ten minutes of figuring out which wire was which, I hooked the tail/brake light up, turned on the switch and…it worked!

Bolstered by the success of the light hookup, I decided to look at the exhaust system. I pulled the stock exhaust off of the bike just as it started snowing.

After putting on a heavier jacket and a cap, I returned to work. The mufflers which I had been running on my Triumph Thruxton until last week slipped right into place. And, they have the benefit of weighing half of what the 16 pound stock units weighed.

I started it up to see how the pipes sound.
They’re loud, but they look so much better than stock!

I accomplished a lot more than I had planned on, for a cold day. I still need to get some wire connectors and hook up the taillight ground correctly. (I just have the stripped end of the wire jammed into the female connector on the bike’s wiring harness). I also need to put a gasket on the headers where the mufflers slip on, and attach the rear braces to the frame.