XS 650 STREETRACKER PROJECT
I picked this 1977 XS 650 up on January 9, 2006. I bought it from Kevin, the service manager at the local Triumph dealer, after my best friend Brad “brokered” the deal. Cost: $400.00.
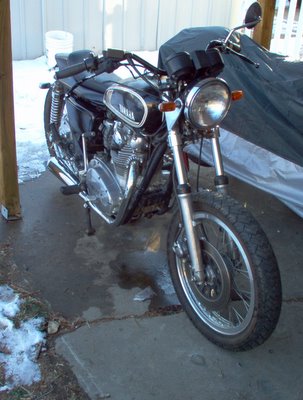
As you can see, it was fairly stock. The original seat was in sad shape, and the body work was all in primer, but all of the pieces were there.
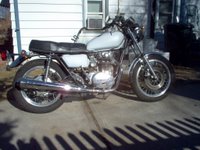
Unfortunately, the master cylinder for the disc brake had gone bad, and the choke lever was missing from the carb.
Along with the bike, and various rubber mounting parts, I also got a new set of Bridgestone tires and new tubes. The bike also had a set of wide flat-track racing bars.
This was fine with me, as I had decided to build this bike up as a “streetracker” style bike. So, I ordered a $245.00 seat/tailpiece, and set about working on the bike.
I went down to the battery store and spent $32.00 on a new battery. Once it was hooked up, I sprayed some starter fluid in the carbs and kicked her over. On the third kick, the motor started. I was quite happy with that.
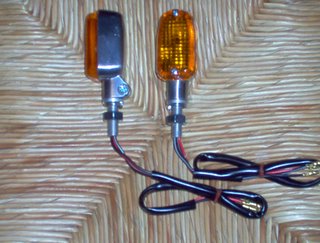
The motor started, the lights worked and even the flashers were operational. The next thing to address was the front brake.
Since the plastic reservoir on the master cylinder was in such poor shape and the lever was broken, I decided to replace the whole unit. While I was at Steele’s Motorcycle Salvage, picking up a working master cylinder, I found a rough but usable tank from a 1975 XSB. I figured I would use that tank to get the bike up and running, rather than putting gas into the primered tank which came with the bike.
Brake parts and tank cost me $96.00.
Once I was home, I removed the old brake cylinder, and installed the new one. I filled it up with fluid, and started trying to bleed the air from the system. Three hours later, I gave up. The temperature was in the mid 30’s, and the wind was cutting through me like a knife as I worked on my covered patio.
I got on the internet and did some reading. Seems that if you get enough air into a brake system, you simply can’t get it to bleed in the normal manner. What is required is a vacuum pump-style brake bleeder to pull the air out.
So, down to Performance Motorcycle parts the next day (Friday the 13th). The vacuum bleeder ($41.00) and a set of K&N filters ($83.00) set me back $126.00.
Thirty minutes after I got home with the bleeder system, the brakes were working. Money well spent.
Before I went to Performance, the mailman had delivered my seat/fender. After getting the brakes set up, I went to the auto parts dealer down the street and picked up some parts (fuel line and ground wire for the tail light). Tyler Max, who will hopefully use this bike to learn to ride, had come over after school and went with me to the auto parts dealer.
When we got back to the house, we hooked up fuel line to the (leaky) petcocks, and trimmed the frame down in order to “dry-fit” the seat and tank.
Then, we set the seat in place, with gas in the tank…

With a liberal application of starter fluid and enough kicking to make me sweat (temps in the 60’s), we got the motor started. It idled fine, once the carb float bowls filled with gas, but wouldn’t rev up with the throttle.
So the next step is to trouble shoot the carbs. Hopefully, the throttle jets are simply clogged from fuel varnishing (the bike sat for 3 years without running). But, the diaphragms in the carbs may have deteriorated.
At this point, the total cost added up to $899.00.
01/14/2006
A red letter day in the project.
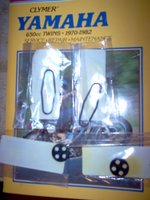
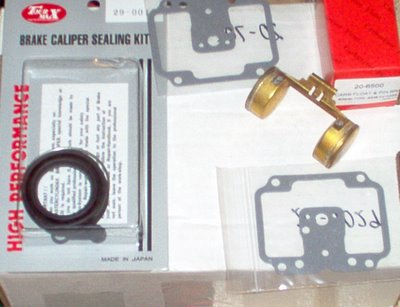
This morning I went to Vickery Motorsports and bought the rubber gaskets for the fuel petcocks. Four inner gaskets and four o-rings set me back $60.00! Ouch! But, I want to have both tanks usable, so I have to overhaul 4 petcocks.
Thirty dollars worth of rubber parts resting on my Clymer manual.
After I got the petcocks fixed, I took the jets out of the carbs and blew the junk out of them. Then, after reassembling the carbs and hooking up the tank, I started the motorcycle and actually rode it up and down my street.
I was a little nervous. After all, I was riding a bike which had not moved under its own power for about 3 years (no telling what might happen), and the seat pan was just sitting on the frame, held in place by my weight. But, I made it up and down my block without incident, and parked it back on the patio.
At that point, I got out the trusty angle grinder and removed the stock seat hinges and lock assembly, ground the welds down and sprayed a little black primer on the raw metal. Don’t want the frame to rust.
As the sunlight was fading, I sprayed some gloss black on one of the side covers, and hung it on the bike. I just wanted to see how it would look.
It looked pretty good to me.
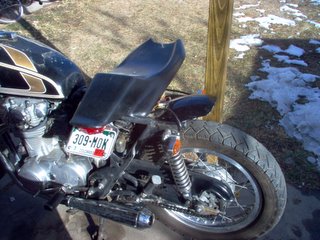
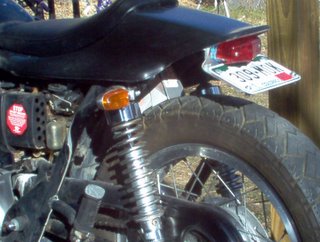
 Here it is from the rea
 r:
r:
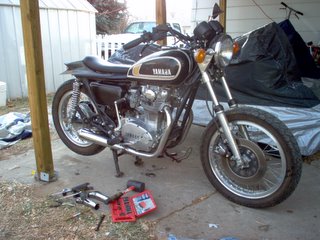
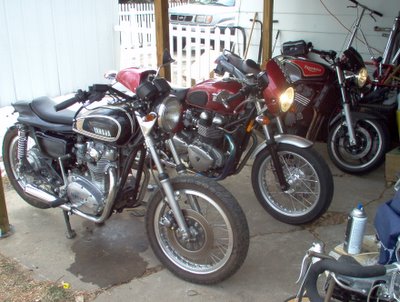
World’s messiest patio?
The next step, I believe, should be to fabricate the mounts for the seat pan. I purchased iron stock for this, today ($10.00)
Cost so far: $970.00.
01/15/2006
The weather forecast called for a winter storm to move into Denver, so I decided to try and get the seat mounted and put the bike under a cover until better weather moved back in.
I used some steel strapping, sourced from Ace Hardware, to bend up a rear mount and a front mount closely approximating those suggested by Hotwing (the seat manufacturer).
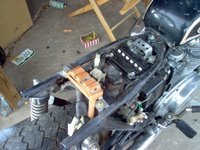
I wrapped the rear mount in rubber for vibration damping.
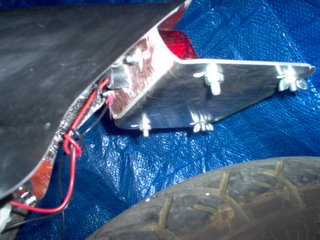
I drilled two holes into the plate which spans the frame just in front of the shock mounts, and bolted the rear bracket in place. The front utilized two existing bolts. Per Hotwing’s instructions, I drilled holes for self-tapping sheetmetal screws to attach the seat pan. (I only drilled one each, front and back, and will put two more in the rear and one additional screw in the front, later.)
I have to say, I don't care much for the self-tapping screws holding the seat on. It is very fiddly to get the holes aligned. I think I'll try to figure out some other method t attach the pan to the braces.
The seat pad will be attached with industrial-strength Velcro, after the seat pan has been painted.
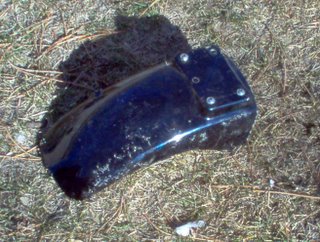
I also pulled the front fender off of the bike, just to check out how it looked. It will probably stay off.
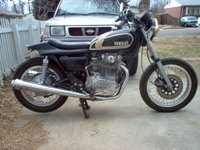
It is beginning to look like a flat tracker. 
01/16/2006
Cold weather moved into Denver, overnight, and we woke to a dusting of snow. However, the temperature warmed, a bit, in the afternoon and I decided to look at the wiring for the tail light.
After about ten minutes of figuring out which wire was which, I hooked the tail/brake light up, turned on the switch and…it worked!
Bolstered by the success of the light hookup, I decided to look at the exhaust system. I pulled the stock exhaust off of the bike just as it started snowing.
After putting on a heavier jacket and a cap, I returned to work. The mufflers which I had been running on my Triumph Thruxton until last week slipped right into place. And, they have the benefit of weighing half of what the 16 pound stock units weighed.
I started it up to see how the pipes sound.
They’re loud, but they look so much better than stock!
I accomplished a lot more than I had planned on, for a cold day. I still need to get some wire connectors and hook up the taillight ground correctly. (I just have the stripped end of the wire jammed into the female connector on the bike’s wiring harness). I also need to put a gasket on the headers where the mufflers slip on, and attach the rear braces to the frame.





 Here it is from the rea


